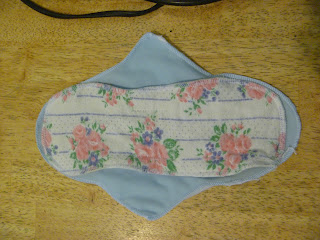
I've said previously that these are really easy to make, and they don't really need a tutorial. But in case you are visually minded, I've put together a step by step of my process. There are heaps of other really good tutorials out there, so if my method doesn't work for you, just search for one that does.
Materials
PUL - enough for the full shape of the Mama pad, and some smaller scraps
Absorbent material - cotton, bamboo, microfibre, are all good choices
Snaps - either metal or plastic.
Stay dry material - like microfleece (optional).
note: I have Mama pads with both a stay dry layer and without, and to be honest, I don't notice a difference, so feel free to skip that last material if you don't have it.
Cut an hourglass shaped pad (not a squashy rectangle thing like I ended up with) from your absorbent materials.
Note: the size and shape of this is entirely up to you. You may need to experiment with things like size, number of absorbent layers and shapes until you get something that is comfortable for you.
Using your pad shape, cut a larger hourglass with wings shape from your PUL. It should be larger all around than your pad.
Cut a scrap of PUL to fit over the widest part of your wingy shape. You need this as reinforcing for the snaps on the wings, and also to cover the stitching from your pad (scroll down to see what I'm talking about.)
Note: If you wanted, you could cut two wingy shapes from PUL rather than just using a scrap. I haven't needed the extra protection, and I'm cheap so I just use a scrap.Note: I use my overlocker for this but if you don't have one, a zigzag stitch on your sewing machine should do the job equally well
Stitch the pad onto right side of the wingy shape using two straight lines in the middle of the pad lengthwise - its clearer in the next photo. These should be at approximately the same place as the wings, so that your scrap of PUL will cover them.
Place your PUL scrap, right side to the wingy shape's wrong side, so that it covers the stitching and will also create two layers of fabric on the wings.
Overlock around the wingy shape. If the pad gets in the way, you should be able to move it around to overlock the PUL, since it is only attached in the middle.
Put snaps on the wings - I'm sorry, I failed and didn't take a photo of this step, but you want to put the snaps as close to the corner of the wings as you can. I use metal snaps because they are cheap and I don't own a snap press, but plastic snaps would work equally well.


No comments:
Post a Comment
Please leave a comment, please, pretty please,